
To host a static website on AWS S3, you need the following resources
- Registered domain
- Access to domain registrar (Ex: GoDaddy, AWS area51) to configure DNS CNAME
- AWS Management Console Access using root user or IAM
- S3 Full Access Permissions if you are using IAM user
For suppose you have a domain product.example.com and want to server static website host on AWS S3. You need to create a bucket name as “product.exmaple.com”
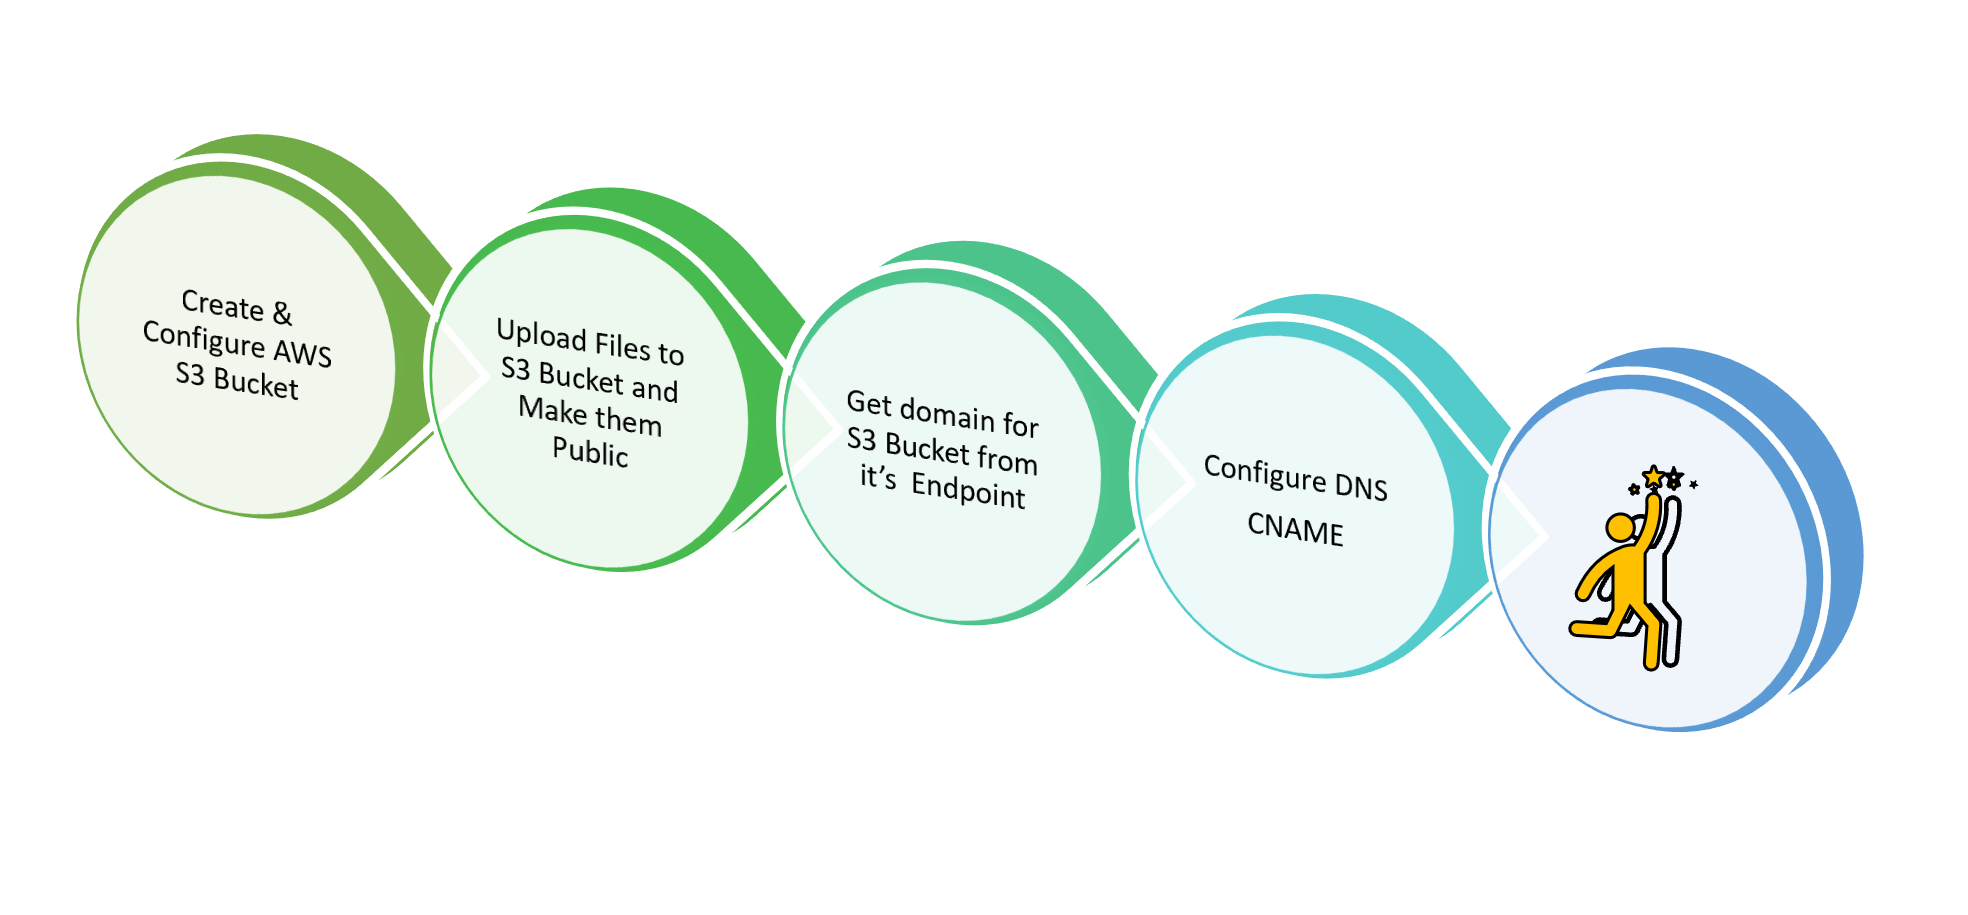
3 Simple steps to get web site running
- Create & Configure AWS S3 Bucket
- Upload Files and Make them public
- Configure DNS
Create & Configure AWS S3 Bucket
Following steps described below to create bucket and upload files into bucket
- Go to AWS S3 Dashboard
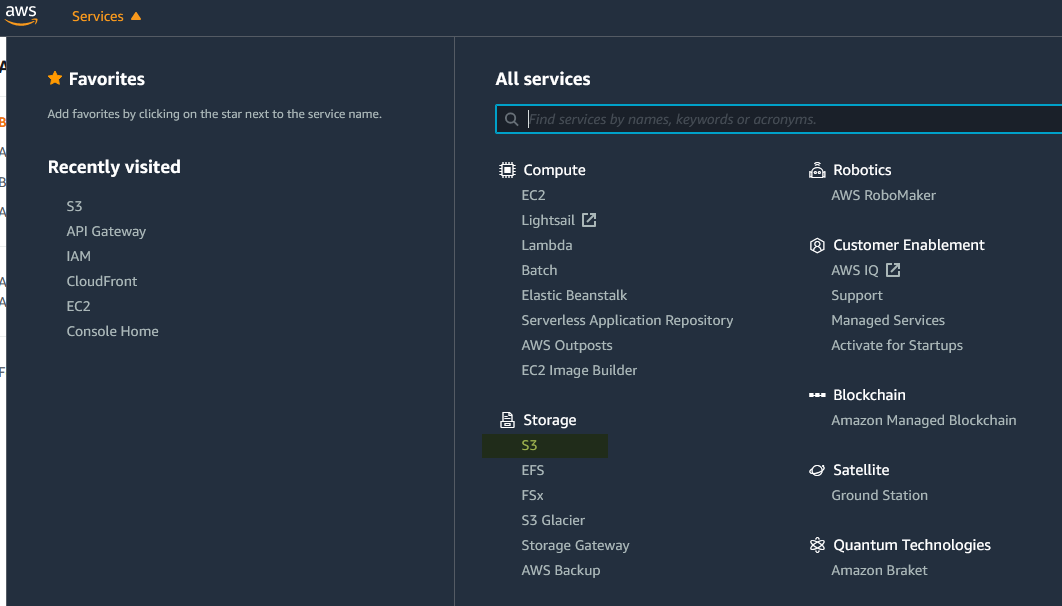
2 Create Bucket with name which is identical to domain name (ex: product.example.com)
Click on Create Bucket

Give desired bucket name, here in this case it is name of domain on which this web content needs to be served. Then, select the region in which bucket needs to be created. Select nearest region if audiences of website are domestic for less network latency
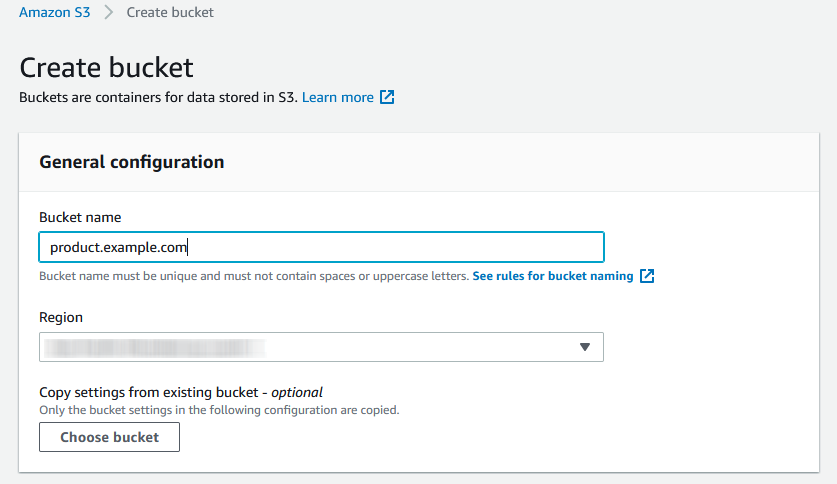
If you are hosting website on “product.eample.com” bucket name must be the same
Since bucket is the store for the public website, we need to allow public access. To do so, uncheck the “Block all public access” as show in the following image while creating bucket

Finally, click on the create bucket at the end of the page to create bucket with given settings
Now, configure bucket properties to host static website.
Select the create bucket and then click on “Properties” from header to enable “static website hosting”

Click on edit on the option “static website hosting” and then enable with proper settings as shown below
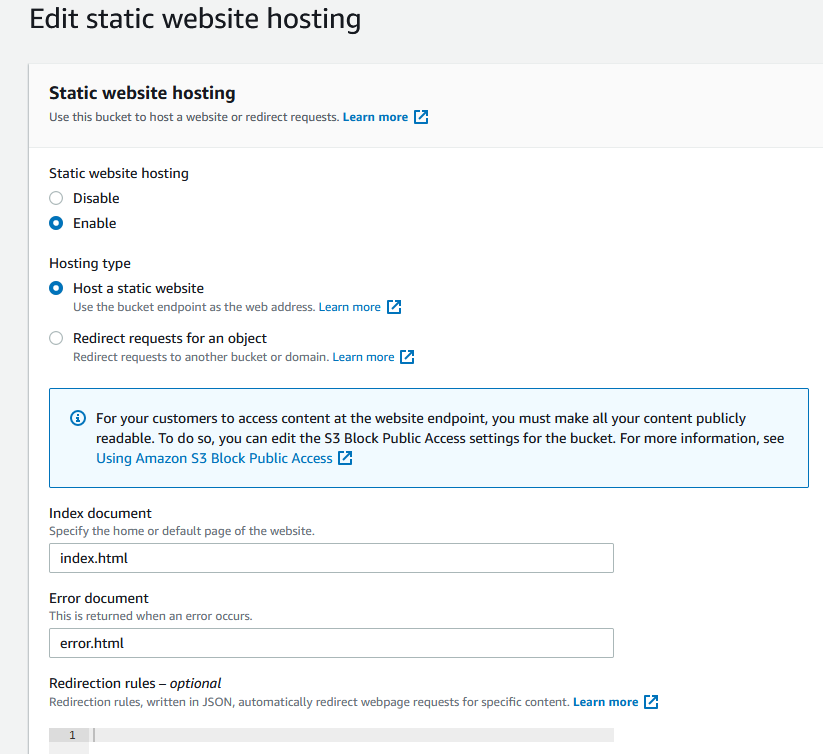
It is import to provide the index page. Typically it would be “index.html”
Once this setting is enable, you can get the end point in the properties of bucket under “static website hosting” as shown below
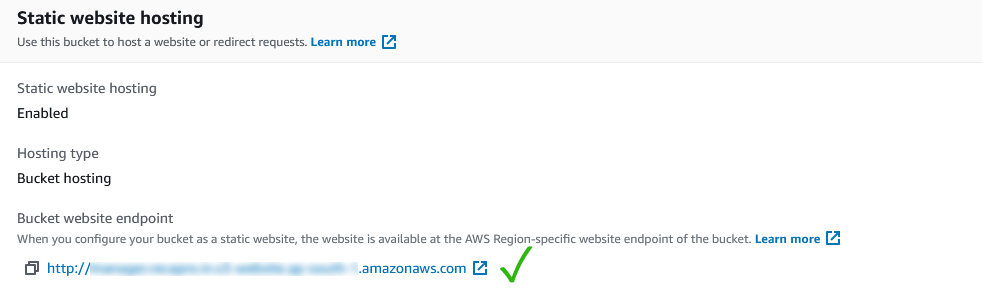
Format of S3 bucket endpoint is as follows
- s3-website dash (-) Region ‐
http://bucket-name.s3-website-Region.amazonaws.com - s3-website dot (.) Region ‐
http://bucket-name.s3-website.Region.amazonaws.com
Upload Files
From objects tab of the s3 bucket select upload multiple files and folders into the bucket
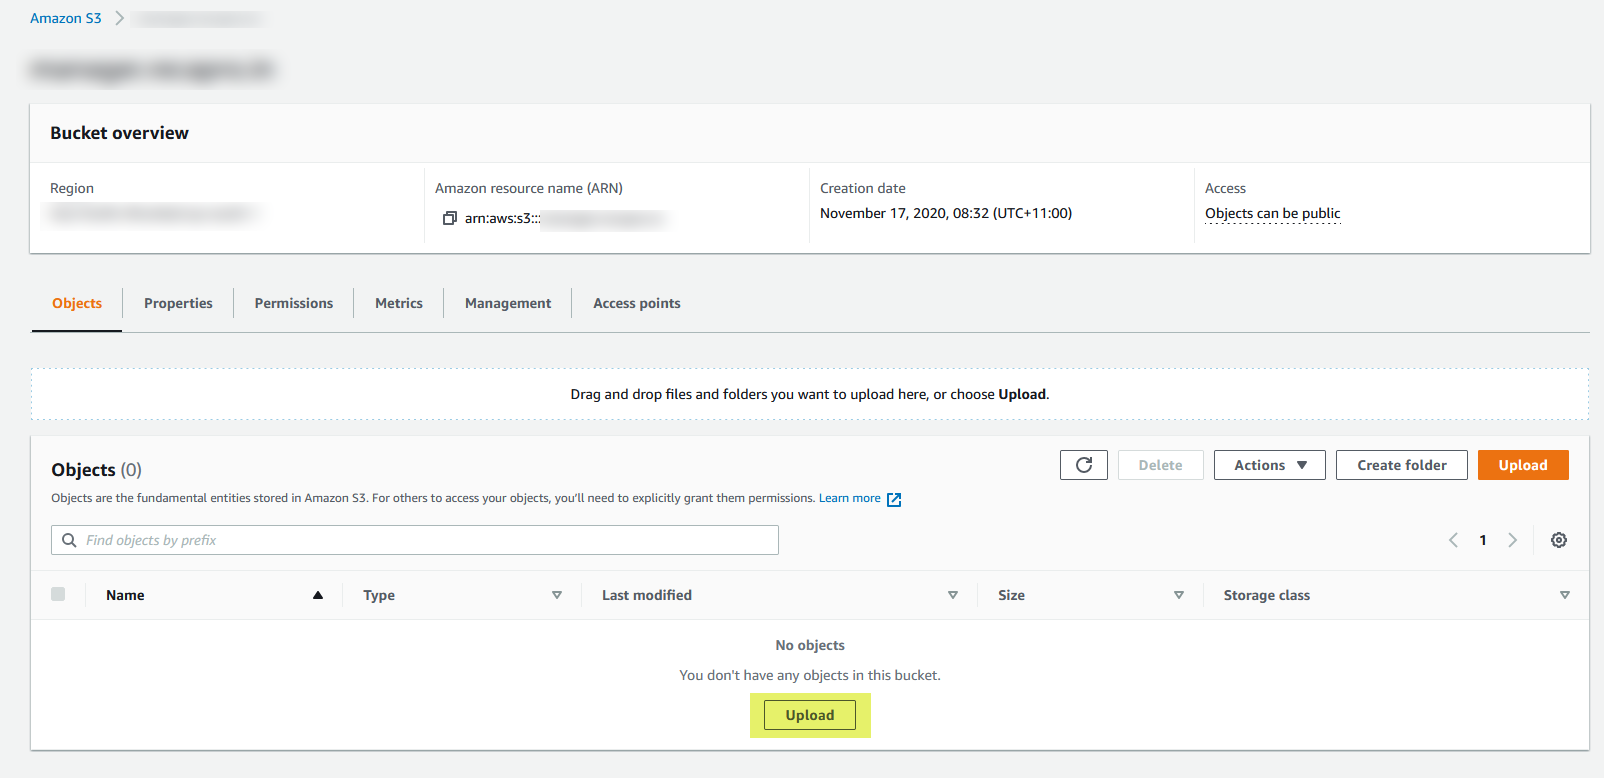
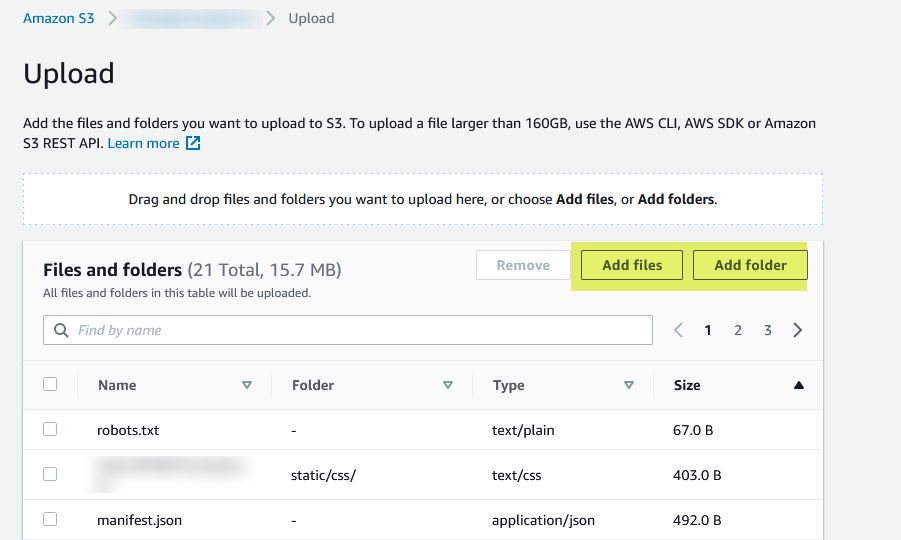
Upload button typically would take to another page where you need to upload files and folders by selecting “add files” and “add folder”. As you upload files consider bucket as root of your project
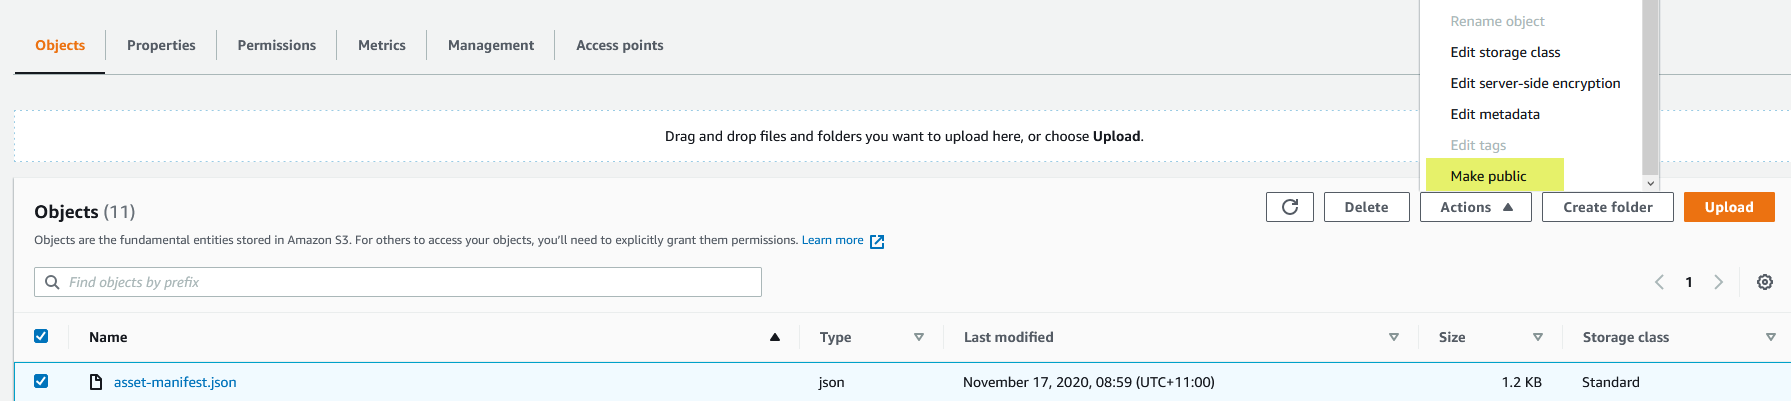
Select all files in the bucket and make them public
Select All files and folder then select “Make Public” from the Action menu and then confirm
Configure DNS
Take the domain name from the endpoint of the S3 bucket which is available in the properties of the bucket under “static website hosting” section and configure it as alias (or CNAME) for the actual domain
Typical domain name for the bucket is as follows
- s3-website dash (-) Region ‐
bucket-name.s3-website-Region.amazonaws.com - s3-website dot (.) Region ‐
bucket-name.s3-website.Region.amazonaws.com
For the demonstration of this tutorial GoDaddy registry is taken. Login to your registry dashboard and select domain to manage or configure DNS
Then, add the CNAME for the selected domain
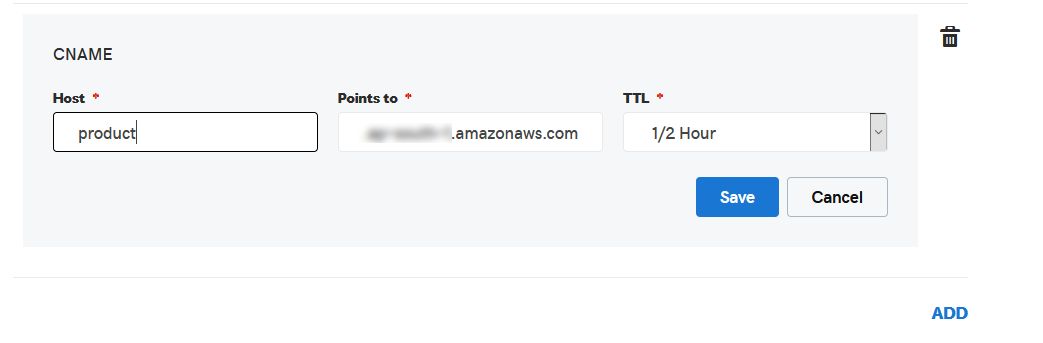
As shown in the above image, suppose if your domain is example.com, to configure CNAME for product.example.com just add “product” in the Host field as shown in the image.
If you do not want to configure subdomain and want to host website for second level domain itself (ex: example.com). Remove A record and add @ in the Host field
Well, if everything goes well you must see website up and running your domain
Unfortunately AWS S3 do not support configuration of custom SSL certificate for you domain. To do so, consider using CloudFront on top of AWS S3 which also comes with great potential of content delivery network, delivering content with low latency geographically
Troubleshooting
- Check if all files and folders are made public with ACL in S3 bucket
- Check if DNS CNAME is properly configured


Leave a Reply